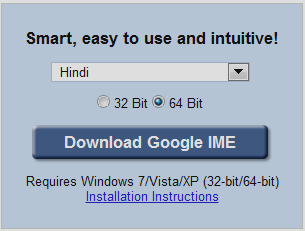
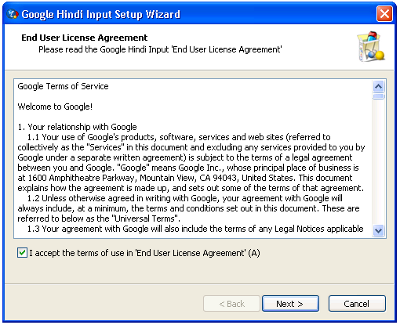
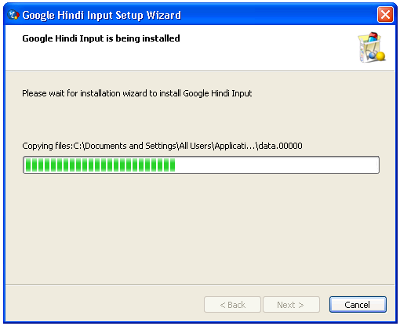
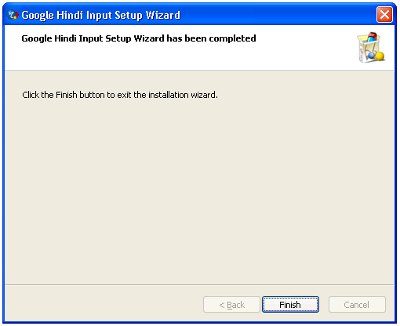
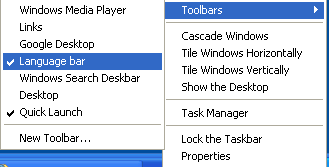
First of all go to Google’s website to download the Google IME software. You should make sure you choose the right kind of download. If your Windows in 64 bit –you should download 64 bit installation. Learn how to find if your Windows is 32-bit or 64-bit. While downloading, you would also need to select the language for which you need the GoogleIME. For the purpose of this tutorial, we will use Hindi language IME. (By the way, I have another tutorial on how to type in Hindi on mobile phone) After the download is complete, run the installation file. In the first step, the setup will download more files from Internet, so you should remain connected to Internet. Once download is complete just follow the setup instructions as below: Using GoogleIME, you can write in Hindi (or any other supported language) directly into any application (e.g. MS-Word, Notepad, Wordpad etc.) In order to begin typing, start the computer application (e.g. MS-Word) and then run Google IME. To run Google IME; make right click on in an empty area on task bar (taskbar is the bar on which start button is located); a pop-up menu will appear. Select Toolbar > Language bar to run Google IME If you don’t see the Language bar option, take the following steps Windows 8 In Windows 8 you can select language and Input method from a pop-up list that comes when you click on language code that is visible adjacent to the clock (bottom right corner). If the desired input method is not there, follow the steps given below:
Go to Control Panel -> Language -> Click on Options link shown against English langauge Click on “Add an input method” Select Google IME
Windows 7/Vista
Control Panel -> Regional and Language Options -> Keyboard and Languages tab Click on Change keyboards… button to open Text services and input languages dialog Navigate to Language Bar tab Enable the radio button Docked in the taskbar under Language Bar section Apply all settings and try to display language bar as mentioned in previous section.
Windows XP
Go to Control Panel -> Regional and Language Options -> Languages tab -> Text services and input languages (Details) -> Advanced Tab Make sure that under System configuration, option Turn off advanced text services is NOT checked. Go to Control Panel -> Regional and Language Options -> Languages tab -> Text services and input languages (Details) -> Settings Tab Click Language Bar Select Show the Language bar on the desktop. Click OK. If you are installing the IME for East Asian language or Right-To-Left language, go to Control Panel -> Regional and Language Options -> Languages Tab Make sure that options Install files for complex scripts and right to left languages and Install files for East Asian languages are checked in the checkboxes. This requires installation of system files and the system will prompt to insert the Operating System Disc. Apply all settings and try to display language bar as mentioned in previous section.
Read Also: Learn how to change hot keys for Input languages. Once you have selected the Language bar option as described above, you’ll see the status window of GoogleIME appearing in the bottom right corner of the screen. You can drag it around and place it anywhere on screen. As mentioned before, you should first run the target application (e.g. MS-Word) and then activate IME Language bar. Now start typing in MS-Word (or any other application of your choice), and you should see that typing is taking place in your chosen language. As you type, edit window of IME will appear giving you choice of words that you might want to type. You can select any of these words by navigation using UP and DOWN arrow keys. It is not necessary that you select a word from this window. You can go on typing and as soon as you will press ENTER key -the first word in the IME edit window will get printed in MS Word. While typing in your chosen language, you might need to type a few words in English as well. For this you can quickly toggle between languages using F12 key. While typing in Hindi, if you press F12 key, the input language will get changed to English. When are finished typing in Hindi, press F12 again to go to back Hindi. Sometimes, you will find yourself wondering how to type a particular character in Hindi. In such cases, you can bring up the on-screen keyboard by pressing CTRL+K. Now you can click on any character given in the keyboard and it will get printed. When you are done taking help from on-screen keyboard, press CTRL+K again and start typing on your physical keyboard. I hope this tutorial was useful for you in learning how to use GoogleIME on your computer. If you have any questions, please feel free to ask me! Formerly Google Malayalam IME had a Scheme file with extension Scm. It gave the correspondence between Englsh characters and Malayalam charactersand so it was possible to customise English and Malayalam characters. The greatest advantage was that we were able to use familiar English key sequence for Malayalam characters. Unfortunately, this facility is not seen in the latest version of google Malayalam in put method. So kindly advise me how to customise English and Malayalam characters in thisversion. Sadly, now I am forced to use older version of Windows just to type Malayalam in the way I want. Also inform me whether there is any input method in whic customisation is possible With thanks Abdurazak. Is there any way we can include ISM ML fonts to Google IME so that we can avoid converting them afterwards? Comment * Name * Email * Website
Δ
